Proper t-shirt design placement is crucial for aesthetics and functionality‚ ensuring designs are visually appealing and professionally aligned. This guide explores optimal positioning for various styles and preferences.
1.1 Importance of Proper Design Placement
Proper design placement is essential for ensuring a professional and polished look; Incorrect placement can make designs appear off-center‚ misaligned‚ or disproportionate‚ affecting the overall aesthetic. It also impacts functionality‚ as poorly positioned artwork may not align with the intended target area. Proper placement ensures designs are balanced‚ visually appealing‚ and suitable for the intended purpose. This guide emphasizes the importance of accurate measurements and alignment to achieve the best results for various t-shirt styles and designs.
1.2 Overview of Standard Print Locations
Standard print locations for t-shirt designs include the chest‚ sleeves‚ back‚ and collar areas. The chest area is the most common‚ with options like center or left chest placement. Sleeves offer space for smaller designs‚ while the back allows for larger‚ bold artwork. The outer neck collar is ideal for subtle branding. Each location serves a specific purpose‚ ensuring designs are proportionate and visually appealing. Understanding these standards helps in creating balanced and professional-looking t-shirt designs tailored to various styles and preferences.
Front Placement Options
Front placement options include center chest‚ left chest‚ and full front designs. These locations are popular for logos‚ graphics‚ and text‚ with measurements varying by design type and shirt size.
2.1 Centered Chest Design Placement
The centered chest design is a classic choice‚ typically placed 3-4 inches below the collar‚ aligning with the shirt’s centerline. This placement ensures symmetry and visibility‚ making it ideal for logos or graphics. The design size usually ranges from 8 to 12 inches wide‚ depending on the shirt size. It works well for bold or detailed artwork‚ creating a balanced look. Proper alignment tools are recommended to achieve precise placement‚ ensuring a professional finish for both casual and formal designs.
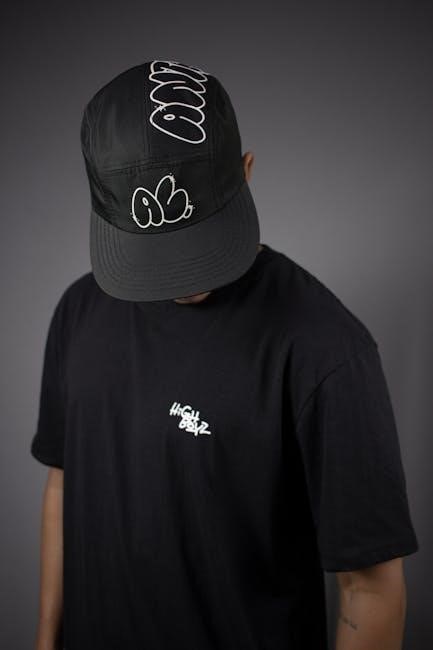
2.2 Left Chest Logo Placement
Left chest logo placement is a popular choice for its subtle yet professional appearance. Typically positioned 3-4 inches below the shoulder seam‚ this design is ideal for small to medium-sized logos or graphics. It’s often used for school uniforms‚ promotional items‚ or casual wear. The logo size usually ranges from 3 to 5 inches wide‚ ensuring visibility without overwhelming the design. This placement works well for minimalist aesthetics and is easily aligned using tools like the left chest logo placement ruler‚ ensuring precise and professional results every time.
2.3 Full Front Design Placement
Full front design placement offers a bold‚ eye-catching option‚ covering the entire chest area. Typically starting 3 inches below the neckline and extending to the armpit level‚ this placement is ideal for detailed graphics or large logos. The standard size ranges from 12×15 inches for adult shirts‚ ensuring the design remains proportional without overwhelming the garment. Alignment tools like heat press guides are essential for precise placement‚ making this option perfect for creating a striking visual impact while maintaining professional aesthetics.
Back Placement Options
Back placement offers a wide canvas for designs‚ enhancing visibility and aesthetic appeal. It’s ideal for bold graphics or text‚ with options like upper back or full-back designs.
3.1 Upper Back Design Placement
The upper back design placement is a popular choice for bold or detailed graphics. It’s typically positioned 6 to 9 inches below the collar seam‚ centered and aligned with the left shoulder seam. This ensures the design is visible and balanced. Using a t-shirt ruler guide helps achieve accurate placement‚ avoiding common mistakes like misalignment or oversized prints. This placement is ideal for creating a professional and polished look‚ enhancing both aesthetic appeal and functionality.
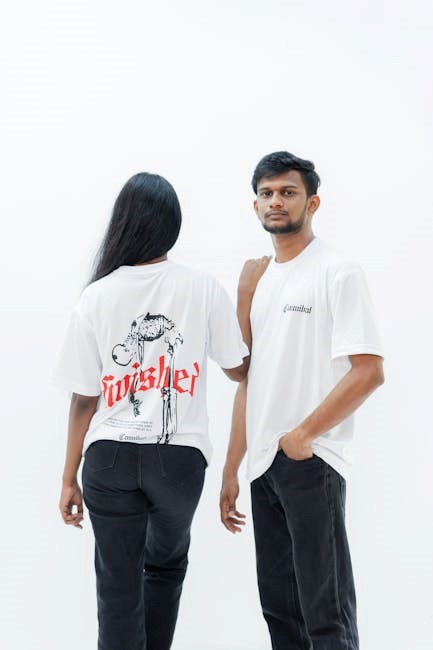
3.2 Full Back Design Placement
The full back design placement is ideal for large‚ detailed graphics or bold statements. It typically covers the entire back panel‚ centered and aligned with the shirt’s vertical axis. The design should start about 6 inches below the collar seam and extend evenly to the bottom hem. Using alignment tools ensures proper positioning and proportion. This placement is great for making a strong visual impact while maintaining balance and professionalism. Proper sizing and alignment are key to avoiding a cluttered look.
Sleeve Placement Options
Explore creative possibilities with sleeve designs‚ typically placed 3-4 inches above the cuff for a balanced look. Alignment tools ensure accurate and professional placement on both sleeves.
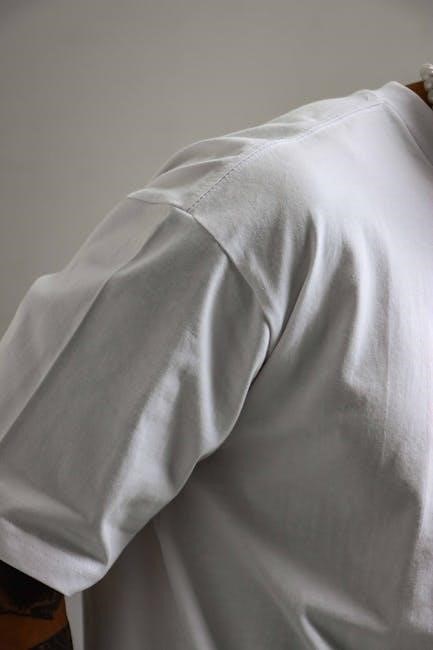
4.1 Left Sleeve Design Placement
Left sleeve designs are a popular choice for subtle branding or complementary artwork. Typically placed 3-4 inches above the cuff‚ this placement ensures visibility while maintaining balance. Alignment tools‚ like rulers or heat press guides‚ help achieve precise positioning. The design should be proportional to the sleeve length‚ avoiding seams or folds. This placement works well for logos‚ small graphics‚ or text‚ creating a polished and professional look that complements the overall design without overwhelming the garment.
4.2 Right Sleeve Design Placement
Right sleeve designs offer a modern and balanced alternative to left sleeve placement. Typically positioned 3-4 inches above the cuff‚ this placement ensures symmetry and complements the overall design. Alignment tools‚ such as heat press guides‚ help achieve precise positioning. The design should be proportional to the sleeve length‚ avoiding seams or folds. Ideal for logos‚ small graphics‚ or text‚ right sleeve placement creates a sleek‚ professional look that enhances the garment’s aesthetic without overpowering it.

Other Placement Locations
Explore unique design opportunities beyond traditional placements‚ such as the outer neck collar for subtle logos or the pocket area for added detail and professional flair.
5.1 Outer Neck Collar Design Placement
The outer neck collar area offers a subtle yet effective space for design placement. Ideal for small logos or minimalist artwork‚ it complements the shirt’s natural lines. Typically placed 2-3 inches below the collar‚ this location ensures the design remains discreet while maintaining visual balance. It’s perfect for adding a touch of elegance without overwhelming the overall aesthetic. Ensure the design aligns with the collar’s edge for a polished‚ professional look that enhances both casual and formal designs.
5.2 Pocket Area Design Placement
The pocket area is a unique spot for small designs or logos‚ often favored for its subtle yet noticeable placement. Typically centered on the pocket‚ designs here should be modest in size‚ around 4 inches wide‚ to maintain balance. This location works well for minimalistic styles or complementary text. Ensure the design aligns with the pocket’s edges and doesn’t interfere with its functionality. It’s a great way to add detail without overwhelming the shirt’s overall design‚ making it ideal for casual or themed apparel.
Tools and Guides for Accurate Placement
Use a T-Shirt Ruler Guide or alignment tools for heat press printing to ensure precise design placement. These tools help center designs and maintain proportional measurements for professional results.
6.1 Using a T-Shirt Ruler Guide
A T-Shirt Ruler Guide is an essential tool for precise design placement. It measures 8.27 x 7.24 inches‚ ideal for left chest logos‚ heat press printing‚ and embroidery; The guide ensures designs are centered and proportionally aligned‚ preventing errors. Suitable for adult and youth shirts‚ it helps maintain consistency across different sizes. Use it to mark accurate positions for logos or artwork‚ ensuring professional results. Recording measurements on sample shirts can also enhance efficiency and accuracy in production.
6.2 Alignment Tools for Heat Press Printing
Alignment tools are vital for precise heat press printing‚ ensuring designs are centered and symmetrical. Tools like the Copkim 3 Pcs Left Chest Logo Placement Tool (8.27 x 7.24 inches) are designed for accurate positioning. They suit various materials‚ including acrylic and embroidery‚ and work for both adult and youth shirts. These guides help maintain consistency and prevent misalignment‚ ensuring professional results. By marking exact positions‚ they streamline the printing process‚ saving time and enhancing overall quality.
Best Practices for Design Placement
Best practices involve sizing artwork appropriately‚ ensuring proportional placement‚ and using tools like heat press guides for alignment. Measure designs from the collar and align with seams for professional results.
7.1 Sizing Artwork for Different Shirt Sizes
Sizing artwork correctly ensures designs look proportional on various shirt sizes. For adult shirts‚ designs are typically 11×11 inches‚ while youth sizes require smaller dimensions‚ around 10.5 inches. Always measure from the collar and align with seams to maintain balance. Use tools like a T-Shirt Ruler Guide to ensure accuracy. Avoid oversizing‚ as it can overwhelm the garment. Proper scaling ensures a polished‚ professional appearance across all sizes‚ making your designs versatile and appealing to a broader audience.
7.2 Ensuring Proportional Design Placement
Proportional design placement is key to a polished look. Position artwork 3 inches below the neckline and 2 inches from the armpit for balanced alignment. Use a T-Shirt Ruler Guide to ensure accuracy. Avoid designs that overwhelm smaller shirts or appear too cramped on larger sizes. Proper scaling ensures visual harmony‚ making designs appealing across all garment sizes. This attention to detail elevates professionalism and ensures your creations look great on every wearer‚ regardless of shirt size or style.
Common Mistakes to Avoid
Avoid incorrect measurements‚ improper alignment‚ and ignoring shirt type or fabric. Ensure designs aren’t oversized or misaligned‚ as this can compromise the professional appearance of the final product;
8.1 Incorrect Measurements and Alignment
Incorrect measurements and alignment are common pitfalls in t-shirt design placement. Designs placed too high or low can disrupt the visual balance. For example‚ a logo intended for the left chest might end up too close to the sleeve or collar if measurements are off. Similarly‚ misaligned artwork can make the design look unprofessional. Always measure from the collar down and ensure the design is centered between the armpits for balanced placement. Using tools like a t-shirt ruler guide can help avoid these errors. Double-checking measurements before printing is essential for polished results.
8.2 Ignoring Shirt Type and Fabric
Ignoring the shirt type and fabric can lead to design placement issues. For example‚ heavy fabrics may require larger designs for visibility‚ while stretchy fabrics need designs that can expand without distortion. Additionally‚ certain shirt styles‚ like crew necks vs. V-necks‚ have different placement guidelines. Sleeve length and neckline shape also affect where designs should be placed. Always consider these factors to ensure the design looks good and lasts after washing. Different fabrics may shrink or stretch‚ impacting the design’s appearance over time.
Mastering t-shirt design placement ensures professional results. By following key principles and using the right tools‚ you can achieve balanced‚ visually appealing designs that resonate with your audience.
9.1 Final Tips for Professional Results
For professional t-shirt design placement‚ ensure accurate measurements and alignment. Position designs 3-4 inches below the collar for a standard front placement. Use tools like rulers or heat press guides to maintain consistency. Test designs on actual shirts to verify proportions and alignment. Consider fabric type and shirt style for optimal results. Avoid common mistakes like improper sizing or ignoring seam placement. By following these tips‚ you can achieve polished‚ professional-looking designs that stand out and meet customer expectations.
9.2 Resources for Further Learning
Exploring beyond the basics? Dive into detailed t-shirt design placement guides‚ expert tutorials‚ and video demonstrations. Online communities and forums offer valuable insights and tips from experienced designers. Additionally‚ technical specifications and case studies provide in-depth knowledge for specific fabric types and printing techniques. These resources empower you to refine your skills and stay updated on industry trends‚ ensuring your designs are always professional and visually impactful.