
The Deni Ice Cream Maker offers a convenient way to create delicious frozen treats at home, including ice cream, sorbet, and frozen yogurt, with easy-to-follow instructions and versatile recipes included in the manual for a variety of flavors and customization options.
1.1 Overview of the Deni Ice Cream Maker Models
Deni offers a range of ice cream maker models, including 5201, 5202, 5203, 5205, 5210, and 5225, each with unique features. Most models have a 2-quart capacity, while some include additional functionalities like a candy crusher. These models are designed for easy home use, allowing users to create customizable frozen treats. The instruction manual provides detailed guidance for each model, ensuring optimal performance and delicious results.
1.2 Importance of Following the Instruction Manual
Following the Deni Ice Cream Maker manual is crucial for safe and effective use. It provides essential guidelines for assembly, operation, and maintenance, ensuring optimal performance. The manual also includes troubleshooting tips and warranty information. Adhering to its instructions helps avoid common mistakes, guarantees delicious results, and extends the product’s lifespan. Always refer to the manual for specific model requirements and best practices.
Safety Precautions
Ensure the motor base remains dry, avoid immersing it in water, and use a damp cloth for cleaning. Keep children away and handle electrical components safely.
2.1 General Safety Guidelines
To ensure safe operation, keep the motor base dry, avoid immersing it in water, and clean it with a damp cloth only. Prevent children from touching electrical parts or moving components. Regularly inspect cords and accessories for damage. Always follow the manual’s instructions and maintain a clean workspace to avoid accidents during use.
2.2 Electrical Safety Tips
Never submerge the motor, plug, or cord in water. Avoid overloading electrical outlets and ensure the maker is placed on a stable, dry surface. Keep cords away from heated surfaces or sharp objects. Unplug the unit when not in use or during cleaning to prevent electrical hazards and ensure safe operation at all times.
Understanding the Components
The Deni Ice Cream Maker features a canister, motor base, churning paddle, and lid, designed to work together for efficient churning and consistent results, ensuring smooth operation.
3.1 Main Parts of the Deni Ice Cream Maker
The Deni Ice Cream Maker consists of a pre-freezable canister, a motor base, a churning paddle, and a lid. The canister holds the mixture, the motor base powers the churning process, and the paddle ensures even mixing. Some models include a candy crusher for adding mix-ins. These components work together to create smooth, creamy results with minimal effort, making homemade ice cream easy and enjoyable for users of all skill levels.
3.2 Accessories Included with the Maker
The Deni Ice Cream Maker typically comes with a pre-freezable canister, a churning paddle, a lid, and a detailed instruction manual. Additional accessories may include a recipe booklet, a spatula for scraping the canister, and a cleaning brush. Some models also feature a candy crusher for mixing in ingredients like chocolate chips or nuts, enhancing customization options for unique and delicious flavors easily at home.
Assembly and Initial Setup
Unpack and inspect all components, ensuring no damage. Wash parts with warm soapy water, rinse thoroughly. Align the canister and lid properly before first use for optimal performance.
4.1 Unpacking and Inspecting the Maker
Begin by carefully unpacking the Deni Ice Cream Maker, ensuring all components are included and undamaged. Inspect the canister, lid, and churn paddle for any signs of damage or defects. Wash all parts with warm, soapy water, then rinse thoroughly. Dry each component before assembly to prevent water spots. If any parts are missing or damaged, contact Deni customer support immediately for assistance.
4.2 Preparing the Canister for Use
Before first use, wash the canister and lid with warm, soapy water, then rinse and dry thoroughly. Place the canister in the freezer for at least 8 hours to ensure proper chilling. Avoid rushing this step, as a fully frozen canister is essential for optimal churning performance. Once frozen solid, remove the canister from the freezer and proceed to assemble the maker according to the instructions provided.
Pre-Freezing the Canister
Pre-freezing the canister ensures optimal performance. Place it in the freezer for at least 8 hours, preferably overnight, to achieve the necessary temperature for churning. This step is crucial for creating smooth, creamy ice cream. Avoid skipping this process, as it directly impacts the quality of your final dessert. Ensure the canister is completely frozen before proceeding to churn your mixture.
5.1 Why Pre-Freezing is Necessary
Pre-freezing the canister is essential for achieving the best results with your Deni Ice Cream Maker. It ensures an even temperature distribution, which prevents the formation of large ice crystals in your mixture. This step is crucial for producing smooth, creamy-textured ice cream. Without pre-freezing, the mixture may not churn properly, leading to an icy or uneven consistency. Always follow the recommended freezing time for optimal performance.
5.2 Recommended Freezing Time
The Deni Ice Cream Maker requires pre-freezing the canister for at least 8 hours before use. This ensures the mixture chills evenly and prevents ice crystals from forming. Proper freezing is vital for smooth, creamy results. After freezing, remove the canister from the freezer and proceed with the churning process as outlined in the manual for the best outcomes.

Operating the Deni Ice Cream Maker
Pour your prepared mixture into the pre-chilled canister, secure the lid, and turn on the machine. The Deni Ice Cream Maker churns smoothly, transforming your ingredients into a creamy, delicious frozen treat in minutes, ensuring consistent results with minimal effort.
6.1 Step-by-Step Churning Process
Pour your chilled mixture into the pre-frozen canister, ensuring it’s securely locked. Turn on the machine and let it churn for 20-30 minutes, depending on the mixture’s consistency. The motor will agitate the mixture, incorporating air and breaking down ice crystals. Once the desired thickness is achieved, stop the machine, transfer the ice cream to an airtight container, and freeze for firming, if needed, before serving.
6.2 Monitoring the Churning Time
Monitor the churning process closely to ensure optimal results. Most mixtures take 20-30 minutes to churn, depending on consistency. Check the mixture periodically to avoid over-churning, which can lead to ice crystals. Stop when the ice cream reaches a thick, creamy texture but remains slightly soft. Proper monitoring ensures a smooth, even consistency and prevents over-aeration, resulting in a better-tasting final product.

Recipes and Customization
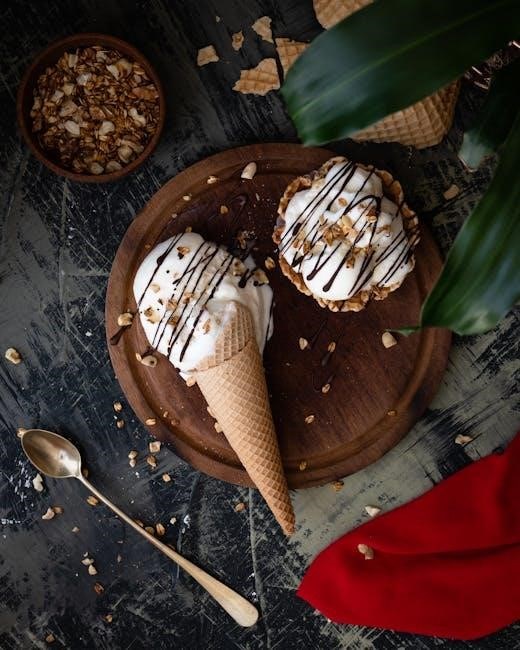
Explore classic recipes like vanilla and chocolate, or experiment with unique flavors like strawberry cheesecake or mango sorbet. Customize with mix-ins, such as nuts or candy, for personalized treats that cater to any taste, ensuring endless creativity and delicious results every time with your Deni Ice Cream Maker.
7.1 Classic Ice Cream Recipes

Start with timeless favorites like vanilla, chocolate, and strawberry, using the Deni Ice Cream Maker. The manual provides simple, foolproof recipes for these classics, ensuring smooth and creamy results. Follow the step-by-step guides to craft authentic, homemade ice cream that rivals store-bought varieties. Perfect for beginners or those seeking traditional flavors, these recipes are easy to customize and always a hit with family and friends.
7.2 Unique and Creative Flavor Ideas
Experiment with unique flavors like Strawberry Cheesecake, Mint Chocolate Chip, or Peanut Butter Cup. The Deni Ice Cream Maker allows you to infuse creativity into your desserts. Try combining fruits, nuts, or even candy pieces for distinctive tastes. Recipes like Frozen Margaritas or Lemonade Ice Cream offer refreshing twists. Let your imagination run wild and craft one-of-a-kind frozen treats that impress family and friends with their originality and flavor.
Cleaning and Maintenance
Clean the motor base with a damp cloth, avoiding water immersion. Regularly wipe the canister and parts with mild detergent. Proper maintenance ensures long-lasting performance and hygiene.
8.1 Proper Cleaning Techniques
After each use, wipe the motor base with a damp cloth, ensuring no moisture enters electrical components. The canister and lid should be washed with mild detergent and warm water. Avoid abrasive cleaners to prevent scratching. All parts, including the paddle and churn, should be rinsed thoroughly and dried to maintain hygiene and prevent bacterial growth. Regular cleaning ensures optimal performance and longevity of your Deni Ice Cream Maker.
8.2 Regular Maintenance Tips
Regularly inspect the parts for wear and tear, ensuring all components are in good condition. Store the canister in a dry place to prevent rust. Lubricate moving parts as needed, and check the electrical cord for damage. Proper maintenance ensures your Deni Ice Cream Maker operates efficiently and lasts for years. Always consult the manual for specific lubrication instructions to maintain optimal performance and safety.

Troubleshooting Common Issues
Common issues include the canister not freezing properly, motor not turning, or mix being too thick. Check freezer temperature, ensure proper assembly, and avoid overloading for smooth operation.
9.1 Common Problems and Solutions
- Canister not freezing: Ensure it’s placed in the freezer for at least 8 hours before use.
- Motor not turning: Check if the canister is properly aligned and the lid is securely closed.
- Mixture too thick: Avoid overloading the maker and use the recommended ingredient ratios.
9.2 Tips for Achieving the Best Results
- Pre-freeze the canister for at least 8 hours before use for optimal performance.
- Use fresh, high-quality ingredients to ensure the best flavor and texture;
- Follow the recipe measurements precisely to avoid overloading the maker.
- Scrape the sides of the canister during churning for an even mix.
- Transfer the finished ice cream to an airtight container and freeze for a firmer texture.

Accessories and Upgrades
Enhance your Deni Ice Cream Maker experience with accessories like the candy crusher or additional canisters. Upgrades and extra parts are available for improved functionality and versatility.
10.1 Recommended Accessories for Enhanced Use
Enhance your Deni Ice Cream Maker experience with recommended accessories like the candy crusher for mix-ins, additional canisters for multiple batches, and a recipe book for inspiration. Optional storage containers keep your creations fresh, while spare parts ensure longevity. These accessories improve functionality and versatility, allowing you to explore more creative and delicious frozen treats with ease and convenience.
Warranty and Customer Support
Your Deni Ice Cream Maker is backed by a one-year warranty from the date of purchase. Keep your instructions and original packaging for warranty claims. Contact Deni customer service for any inquiries or support through their official website or provided contact details.
11.1 Understanding the Warranty Terms
Your Deni Ice Cream Maker is covered by a one-year warranty from the date of purchase, protecting against defects in materials and workmanship. Keep your original receipt and packaging for warranty claims. The warranty is void if the product is misused or modified. Refer to the manual for full terms and conditions. Contact Deni customer support for any warranty-related questions or concerns.
11.2 Contacting Deni Customer Service
For assistance with your Deni Ice Cream Maker, contact customer service via phone or email, details found in the manual or on the official Deni website. Visit www.deni.com for the most accurate contact information and support resources. Ensure to have your product model and purchase details ready for efficient service. For troubleshooting or warranty inquiries, refer to the provided manual or website for guidance.
With proper use and care, your Deni Ice Cream Maker will deliver delicious homemade treats for years. Enjoy experimenting with creative flavors and recipes!
12.1 Final Tips for Enjoying Your Deni Ice Cream Maker
Always pre-freeze the canister for optimal performance and experiment with unique flavors for personalized treats; Regularly clean and maintain the maker to ensure longevity. Explore both classic and creative recipes to maximize your enjoyment. With proper care, your Deni Ice Cream Maker will continue to deliver delicious results, making it a valuable addition to your kitchen for years to come.